The paths of craftsmanship – Local arts and trades
Learn the ancient crafts of Ustica! Make baskets with farmers, fish traps with fishermen, embroideries with local ladies. Preserve traditions that are disappearing and take home your own creation!
Symbol
Orange Ball
Duration
2 hours
Suitable for
All
Description
The experience involves meeting with a local artisan who will describe their work, how it’s done, the craftsmanship, and tradition. The meeting will take place in the town square, from where we’ll move on foot or by bus to the places where the artisans work. The journey will begin by visiting a farmer dedicated to the art of creating “Panari” – useful containers made from local materials (mastic tree, wild olive, and willow) using weaving techniques. We’ll then visit fishermen who still craft “Nasse” – tools used for catching shrimp and soup fish – which are made very slowly using reeds and cane strips, as well as the patient work of “Sarcire,” which is mending fishing nets with a tool called a “vugghia” (large needle) containing nylon. Finally, we’ll meet one of the few local women engaged in “Ricamo” (embroidery), decorating fabrics with techniques requiring great precision. The experience can be done in two ways: either one artisan per excursion or a single meeting with all artisans in one location. The spectator will learn about these crafts and then be immersed in this reality by attempting to replicate the work, guided step-by-step by the artisan.
Highlights
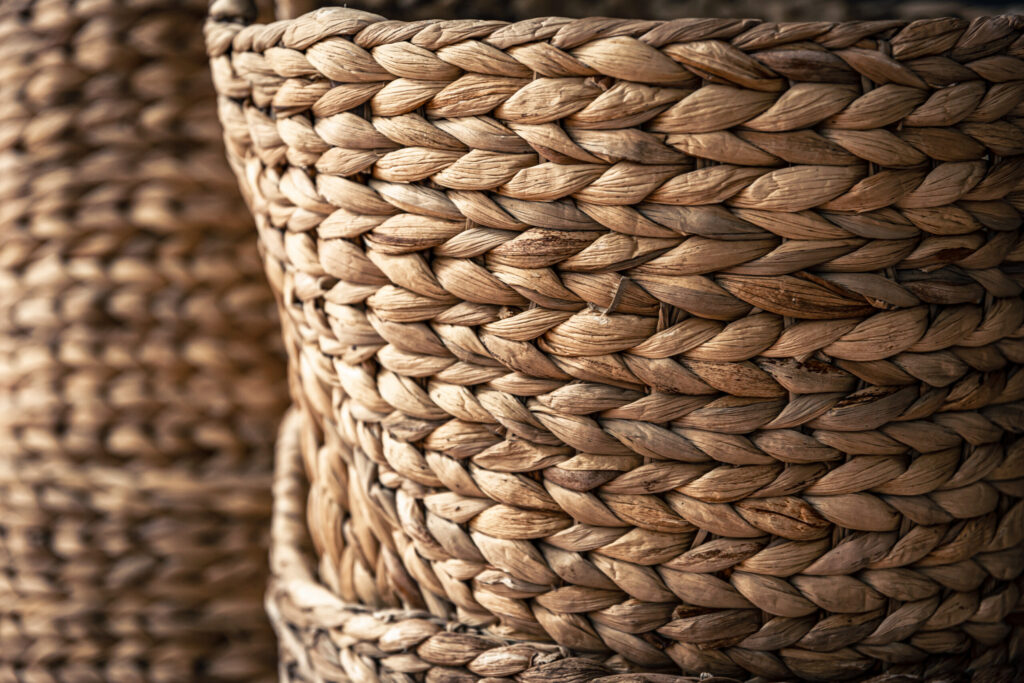
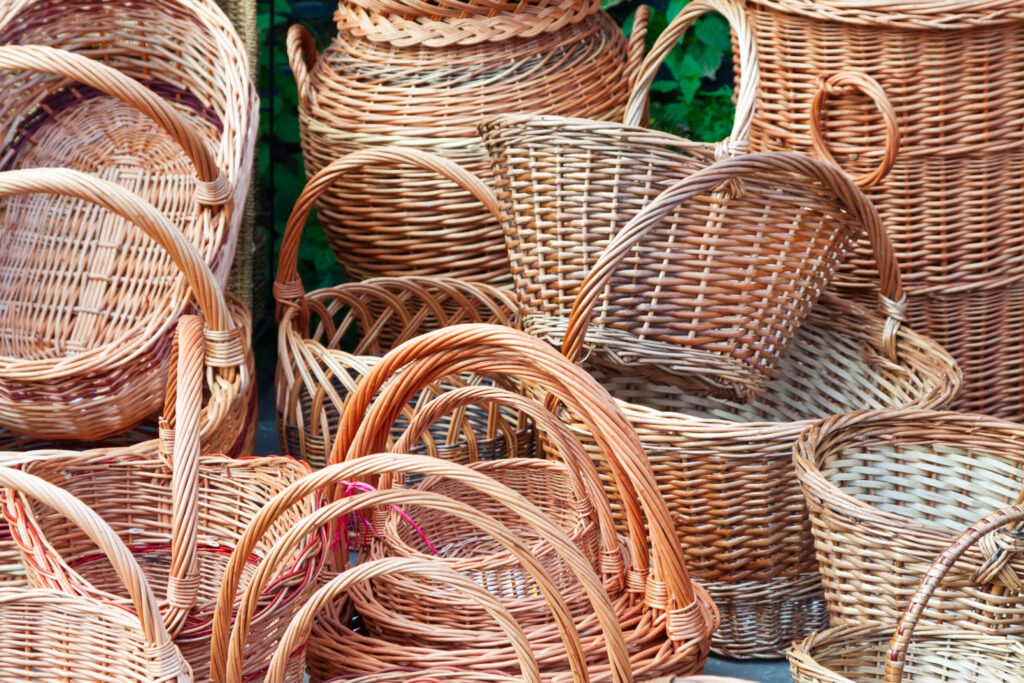
The materials primarily used for making the baskets come directly from the island of Ustica, including: mastic tree, willow, wild olive (the most commonly used material due to its durability), and reeds. The production period is divided into winter and summer seasons. During winter, the material is cut, cleaned, dried, and stored until summer arrives. When summer comes, the wild olive branches are soaked in water to restore their flexibility before being worked.
The crafting process begins with the base, called the “skeleton,” followed by weaving 16 rods together, marking the start of the actual weaving. The basket can be finished with a handle, no handle, or side handles, depending on the preferred design.
One technique revived over the years is shuttle weaving, which differs from others because the base is oval rather than round. This method also allows for creating “light points” (decorative openings).
The baskets serve various purposes—some take the form of traditional baskets used for harvesting crops, while others function as bread or fruit holders. Then there are the “light point” baskets, divided into bedside baskets (mainly placed on the floor) and ceiling baskets, which can be used as actual chandeliers. The light from the bulb reflects through the woven gaps, creating a play of light and shadow.
Smaller baskets require more time to make due to their intricate workmanship, while larger ones are less demanding. The entire process, from material preparation to the finished product, takes about six hours.
The baskets are sold during the summer season, with an initial price of 20 euros to attract customers, though the real cost—factoring in labor—should be much higher. The origins of these baskets date back to Mesopotamia, where similar items were found in caves for daily use. The island once thrived in this craft, but over time, only one family has continued to preserve this rare and unique tradition.
This is an art that has now fallen into disuse, with only five women still practicing it on the island of Ustica. They wish to revive this tradition through embroidery courses. Embroidery is needlework on fabric to embellish it—a meticulous craft that produces true works of art. The women of Ustica have practiced it for over a century, using various types of cotton, both colored and white. The work is done sparingly, primarily for items like linens, pillowcases, bedsheets, clothing elements, curtains, tambourines, or even crochet work. Occasionally, small markets have been held in summer where embroiderers sell some of their pieces.
The technique involves special embroidery frames where stitches are made, the most common being the stem stitch and cross-stitch.
The stem stitch is a basic embroidery stitch used for stems, leaves, and delicate outlines. The process involves stitching from left to right, though experienced embroiderers may adjust for comfort. A round embroidery hoop is useful to secure and stretch the fabric. Designs are transferred using carbon paper, tracing, or freehand drawing. For this stitch, only a few lines need covering with needle and thread, so even photocopied images can serve as guides. The needle is inserted from the back to the front, piercing every 3-5 fabric threads, then brought back out at the end of the previous stitch. There’s also a double stem stitch: worked like the basic version, but the needle pierces the midpoint of the prior stitch. Consistency in stitch length is key for uniformity.
Cross-stitch is a classic, widely recognized as easy to execute. It’s used for household textiles like curtains, table runners, wall art, and towels—ideal for personalizing baby items. It’s worked on evenly woven fabric, ideally with 11×11 to 17×17 threads per inch. The needle should have a large eye to widen entry holes for smoother stitching and a rounded tip for the same reason. Thread thickness should match the fabric and intended use. Colored threads—cotton, wool, linen, or viscose—form a series of Xs in two passes: one diagonal row in one direction, then a return row in the opposite direction. This ensures a neat backside, essential for quality work. Some sections may be finished with backstitch for depth.
The most common thread for cross-stitch is six-strand cotton floss, used singly or doubled depending on desired relief. Suitable fabrics include even-weave linens (like Aida), hemp, or jute (for rustic styles). Thread weight should suit the fabric’s weave for visible detailing.
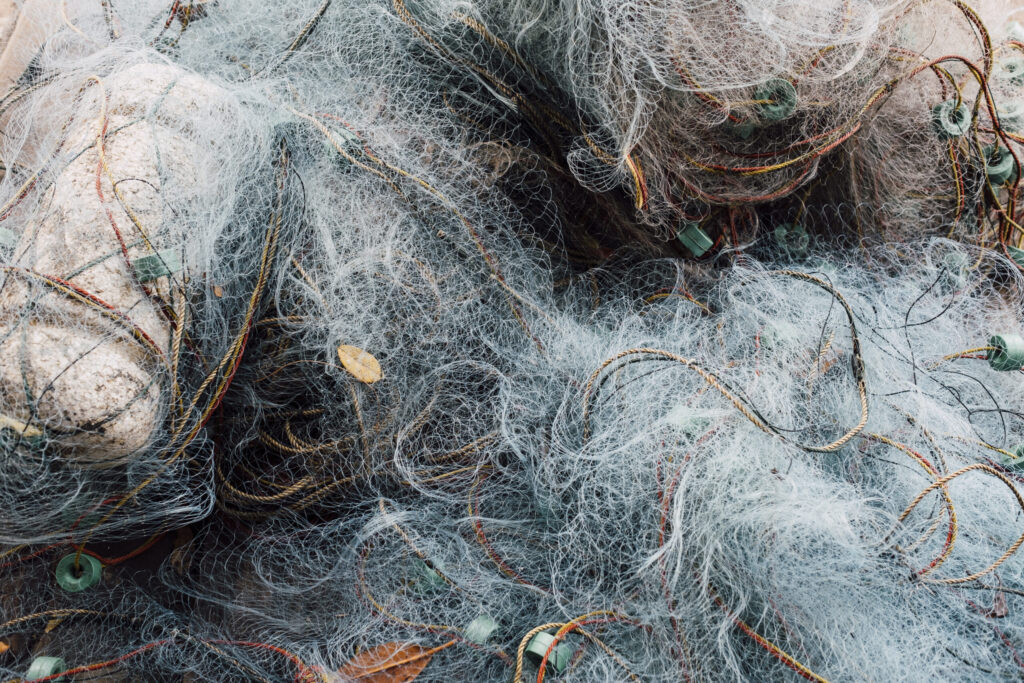
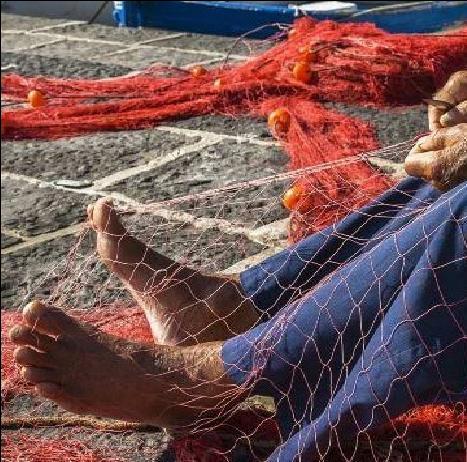
The art of net mending is knowing how to repair fishing nets—a true stitching and repair craft, now practiced only by a few elderly fishermen or descendants who have learned this skill. Mending is extremely important because it significantly reduces costs, materials, and even environmental impact. This work is done using a tool called a “needle,” shaped like a shuttle, which can be made of wood or metal and holds a good amount of nylon.
There are two repair methods: the modification method and the inlay method. The modification method is the primary way to fix the net and is based on the three “feet” above the hole (as the frayed edges of the break are colloquially called). The missing mesh sections are absent in sequence, and the three feet below the hole are finished. Before repairing, the holes should be trimmed so that the top and bottom of the hole have one to three “legs” (attachment points), while the rest are aligned in a single straight line without finishing. This is called the heavy-line modification method.
For larger holes, the inlay method is used, which involves cutting the hole into a square or rectangle and cutting a piece of the same size from the original net. It is embedded into the net with a length shorter than the hole and a wider side, and the four edges and the hole are woven together. The seams are then stitched.
Additionally, to prolong the net’s lifespan, it should be stored about half a meter off the ground, either packed or in wooden boxes inside a well-ventilated warehouse away from direct sunlight. The door should be opened on sunny days and sealed tightly on rainy days. Special attention must be paid to mold and plant-fiber mildew, which should be regularly sun-dried while keeping them away from corrosive sources. If the net is treated with tung oil, it should not be packed and must be spread out on a high rack to prevent heat buildup and spontaneous combustion. Damaged mesh garments should be repaired promptly during storage or while fishing.
Only three people remain in Ustica who still know how to make traditional fish traps using natural materials, enabling eco-sustainable fishing. Their primary use is for catching pink shrimp (Plesionika Narval)—small shrimp often full of blue eggs with a very sweet taste, perfect for eating raw—a true delicacy from Ustica’s waters.
The design of these traps is ingenious: woven with wider mesh than modern traps, they allow smaller shrimp to escape, ensuring greater species proliferation and abundant catches for future fishing—unlike modern traps with tight mesh that catch everything, damaging the species’ survival and future fishing prospects.
The main material for these traps is rush, and proper treatment is crucial to prevent deterioration. The best rushes come from Sardinia—sturdier and intact—though costly. The ideal harvesting time is right after St. Silverio’s feast when they’re still tender. They must be sun-dried and carefully covered at night to avoid moisture. By September/October, they become flexible and durable.
Next, reeds are cut into thin strips for flexibility—a skill requiring practice. Once cleaned and smoothed, work begins from the thinnest end, splitting them into two-meter-long strips just over half a centimeter thick. Lastly, mastic twigs are selected—the least knotty, longest, and thinnest for easy bending.
To start a trap, a mastic twig is bent into a circle, forming the entrance; its diameter determines the trap’s size. The beginning is the hardest—mistakes here carry through, so experience is key to avoid uneven traps. After a few loops, the spiral continues with reed strips, bound together with nylon fishing net thread, following a methodical process.
At the entrance, rushes are tied in groups of two or three with nylon thread, diverging to shape the cage’s weave. Reed strips follow, reinforcing the “bell” structure. The closure uses a sturdier, longer mastic twig than the initial one.
The trap’s structure—its shape and size—emerges from crossing rushes and reed strips into small triangular patterns. A crucial tip: never force the material (reeds and rushes), as proper aging makes them pliant.
The trap has two parts: the “bell” and the cage (where fish enter). The cage’s circular base is slightly smaller than the bell’s end and attaches after insertion. Its construction mirrors the bell’s, forming a funnel where the narrowest part—a rush cluster—lets fish enter but not exit, lured by bait inside.
Today, many request traps as decor. “Once, all fishermen knew how to make them—they had to learn because trap fishing fed them… It was grueling work. To find good fish—like lobsters—you had to lower traps 60-70 fathoms (100-200 meters) deep… Hauling them up was no joke.” Traps vary in size; smaller ones catch fry like damselfish.
Stones secured by a looped rope at the entrance weigh the trap down, flipping it underwater so the funnel mouth stays upright, ready to catch. Smaller traps are trickier to build due to their curved shape and integrated funnel design.
A beautiful, fading art—Ustica’s last three craftsmen hope to pass it on, but island youth show little interest. Perhaps they need encouragement.
Recommended clothing
Suitable for the event
Important Notes
You meet the island’s last artisans to watch them practice their craft, learn their stories, and preserve their knowledge.
There are often steps at the entrance.
Itinerary Data
Recommended Period
from June to September
Time: Between 3:00 PM and 6:00 PM